Explained concepts with practical examples
In today’s interconnected digital landscape, businesses need real-time tools to communicate and react.
This is where webhooks come into play, and Make.com has integrated this powerful feature to enhance your automation capabilities.
In this comprehensive guide, we’ll dive deep into Make.com webhooks, explaining what they are, and how they work, and providing practical examples to help you leverage their full potential.
Quick Summary for Busy Readers (15–30 seconds)
Make.com webhooks are powerful tools for automating workflows by triggering actions based on real-time events.
They allow you to receive instant notifications and data from external services, enabling seamless integration between Make.com and other applications.
Use webhooks to streamline processes, reduce manual work, and create responsive, event-driven automation.

What Are Webhooks?
Webhooks are automated messages sent from apps when something happens.
They’re a way for apps to tell you about events in real time, rather than you having to check for updates constantly.

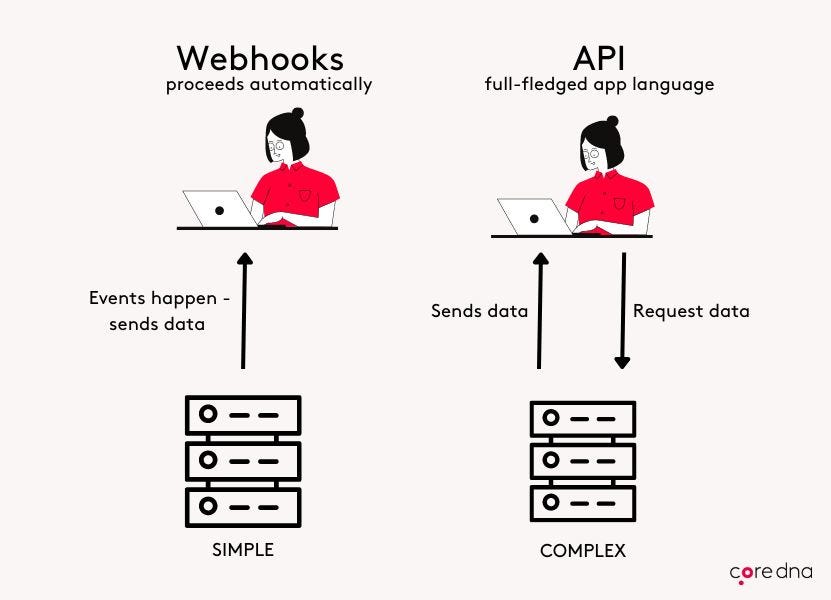
How Webhooks Differ from APIs
While both webhooks and APIs facilitate communication between different software systems, they operate in fundamentally different ways:
APIs (Pull Method):
- Your app actively requests data
- Requires periodic checking
- This can lead to unnecessary API calls
Webhooks (Push Method):
- Data is sent automatically when an event occurs
- Real-time updates
- More efficient use of resources
Why Use Make.com Webhooks?
- Real-time Updates: Receive instant notifications about important events.
- Efficiency: Reduce the need for constant API polling, saving resources.
- Automation: Trigger workflows automatically based on external events.
- Integration: Connect Make.com with a wide range of external services.
- Customization: Tailor your automation to specific events and data payloads.
Setting Up Your First Make.com Webhook
Let’s walk through the process of creating and using a webhook in Make.com:
Create a New Scenario:
- Log into your Make.com account
- Click “Create a new scenario”

Add a Webhook Module:
- In the scenario editor, click the “+” button to add a new module
- Search for “Webhook” and select it
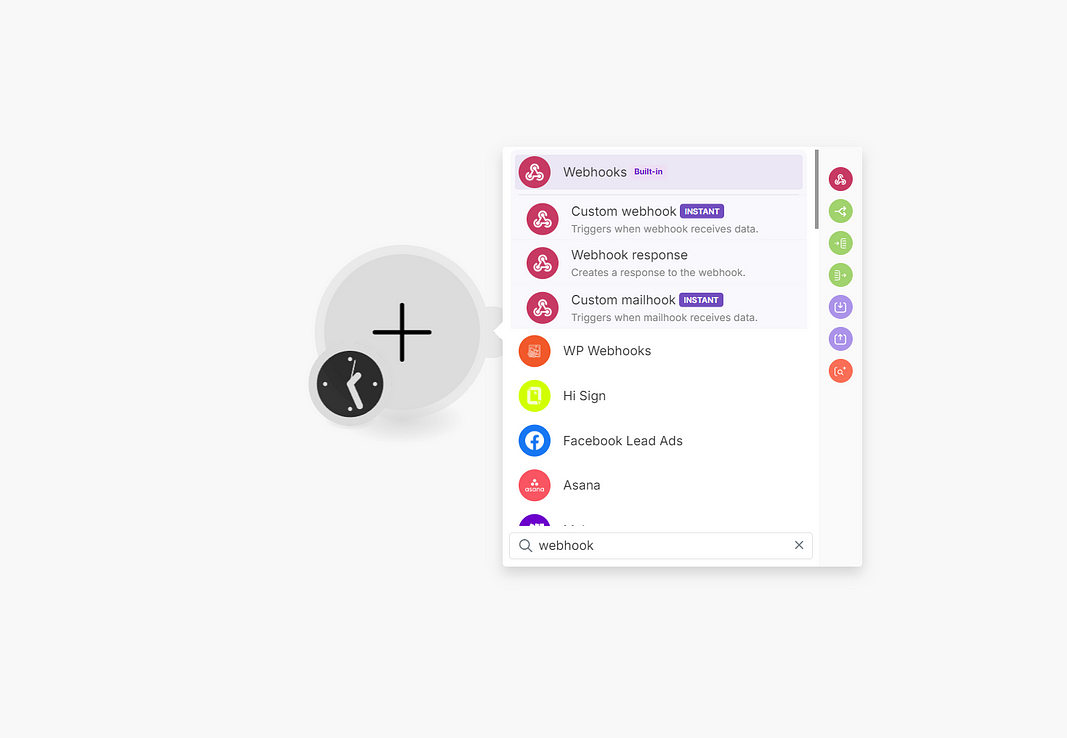
Configure the Webhook:
- Choose “Custom webhook” as the Webhook type
- Copy the generated Webhook URL

- Test the Webhook:
- Use a tool like Postman or cURL to send a test POST request to your webhook URL
- Include some sample data in JSON format
Process the Data:
- Add subsequent modules to process the received data
- Map the webhook data to other actions in your scenario
Practical Examples of Make.com Webhooks in Action
Let’s explore various real-world applications of Make.com webhooks, ranging from simple to more complex scenarios.
For each example, we’ll provide a detailed setup process and a visual representation of the Make.com flow.
1. E-commerce Order Notifications
Scenario: Automatically process new orders from your online store.
Setup:
- Configure your e-commerce platform (e.g., Shopify) to send a webhook when a new order is placed
- In Make.com, create a new scenario and add a “Webhooks” module as the trigger
- Configure the webhook to receive JSON payloads
- Add a “JSON” module to parse the incoming order data
- Add an “HTTP” module to send order details to your inventory management system
- Include a “Shipping Label” module (if available for your shipping provider)
- Add an “Email” module to send a confirmation email to the customer

2. GitHub Issue Tracker
Scenario: Stay on top of new issues in your GitHub repository.
Setup:
- In your GitHub repository settings, add a new webhook pointing to your Make.com webhook URL
- In Make.com, create a new scenario with a “Webhooks” module as the trigger
- Add a “JSON” module to parse the GitHub issue data
- Include a “Slack” module to send a notification to your team’s Slack channel
- Add a “Trello” module to create a new card for the issue

Learn here how to setup a webhook in Github
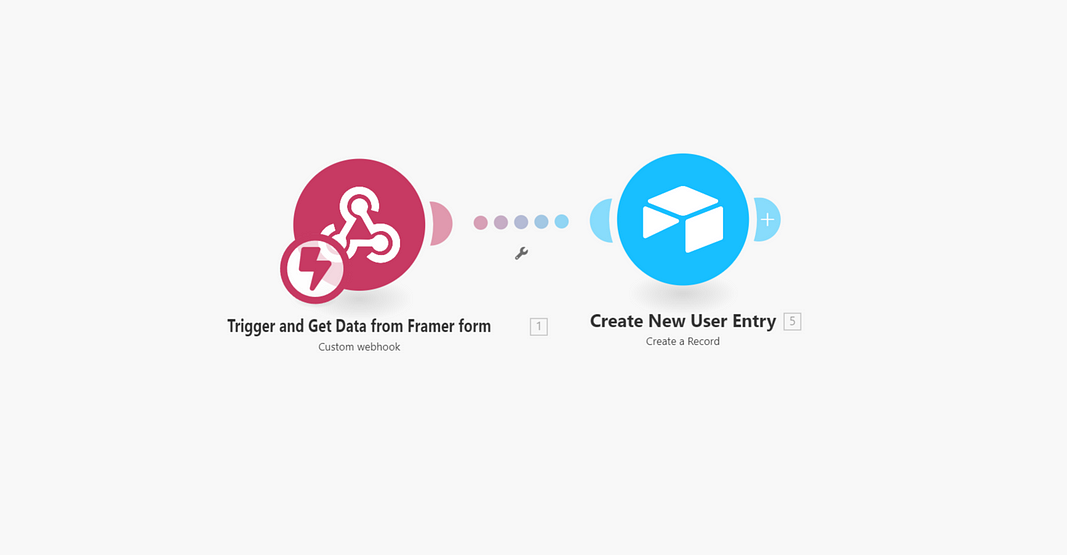
3. Contact Form Submission Handler
Scenario: Automatically process contact form submissions from your website.
Setup:
- Configure your website’s contact form to send data to a Make.com webhook.
- In Make.com, create a new scenario with a “Webhooks” module as the trigger.
- Add a “JSON” module to parse the form submission data.
- Include an “Email” module to send an auto-reply to the submitter.
- Add a “CRM” module (e.g., HubSpot, Salesforce) to create a new contact.
- Include a “Router” module to determine the appropriate team member based on inquiry type.
- Add “Email” modules for each team member notification.

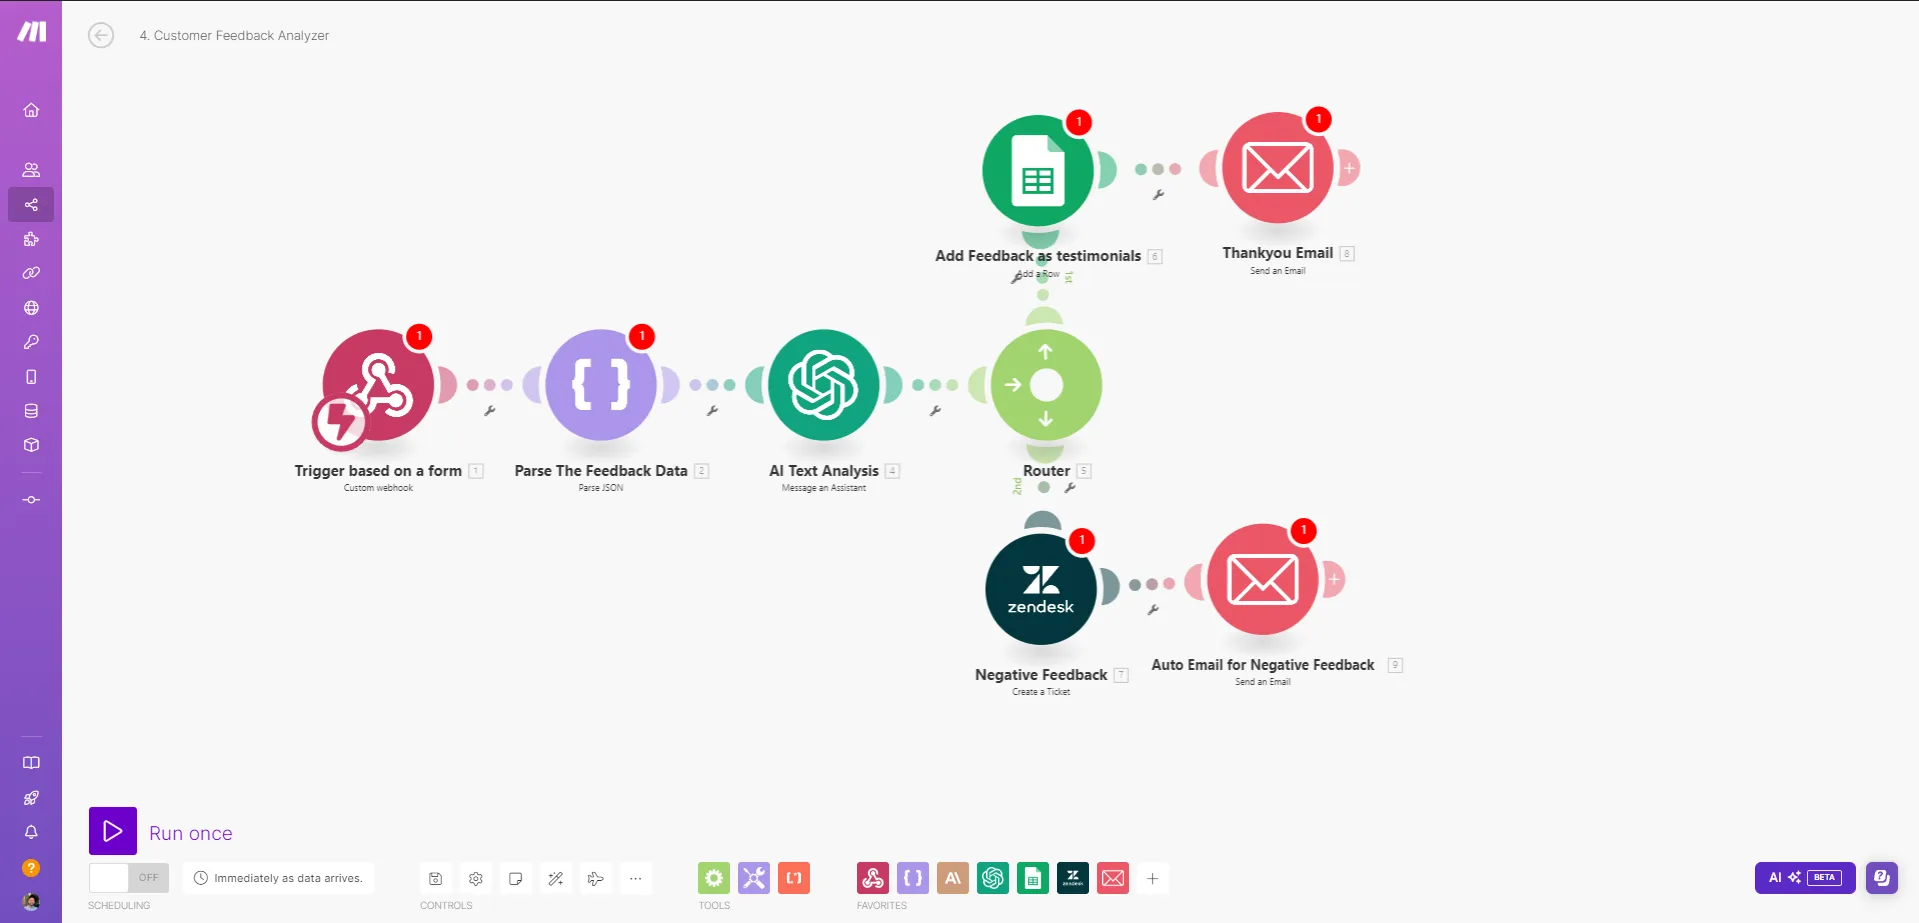
4. Customer Feedback Analyzer
Scenario: Automatically categorize and respond to customer feedback.
Setup:
- Configure your feedback collection tool to send webhooks for new responses
- In Make.com, create a new scenario with a “Webhooks” module as the trigger
- Add a “JSON” module to parse the feedback data
- Include an “OpenAI” module to analyze the feedback sentiment, prompt it nicely, and let me know if you want my prompts.
- Add a “Router” module to categorize the feedback based on sentiment scores
- Include a “Google Sheets” module to log positive feedback as testimonials
- Add a “Zendesk” module to create tickets for negative feedback
- Include an “Email” module to send tailored thank-you emails

Troubleshooting Common Webhook Issues
- Webhook Not Triggering:
- Verify the webhook URL is correct
- Check if there are any firewall issues
- Ensure the sending service is configured correctly
- Data Parsing Errors:
- Double-check the expected data format
- Use Make.com’s data mapping tools to handle inconsistencies
- Rate Limiting:
- Be aware of any rate limits on your Make.com plan
- Implement queuing mechanisms for high-volume webhooks
Conclusion
Make.com webhooks are a powerful tool for creating responsive, event-driven automation.
By leveraging webhooks, you can build sophisticated workflows that react to changes across your digital ecosystem in real-time.


